Traffic Control
Considering the areas of the perioperative environment covered in module two, it is important to note that the semi-restricted, restricted environments, and traffic flow all play a key role in helping to prevent SSIs.
- Personnel in the semi-restricted environment such as OR storage and corridors leading to the OR must wear proper surgical attire and hair coverings.
- Personnel in the restricted environment must wear proper surgical attire and hair coverings including masks when sterile items are open or scrubbed personnel are present.
- Personnel should limit entering and exiting the room as this can cause additional air movement and contamination.
- Clean instruments and supplies should enter the OR through the clean core.
- Soiled instruments and supplies should be contained in a closed cart and sent to the designated area for cleaning.
(King & Spry, 2019; ORNAC, 2021 – 2.6)
How to Establish the Sterile Field
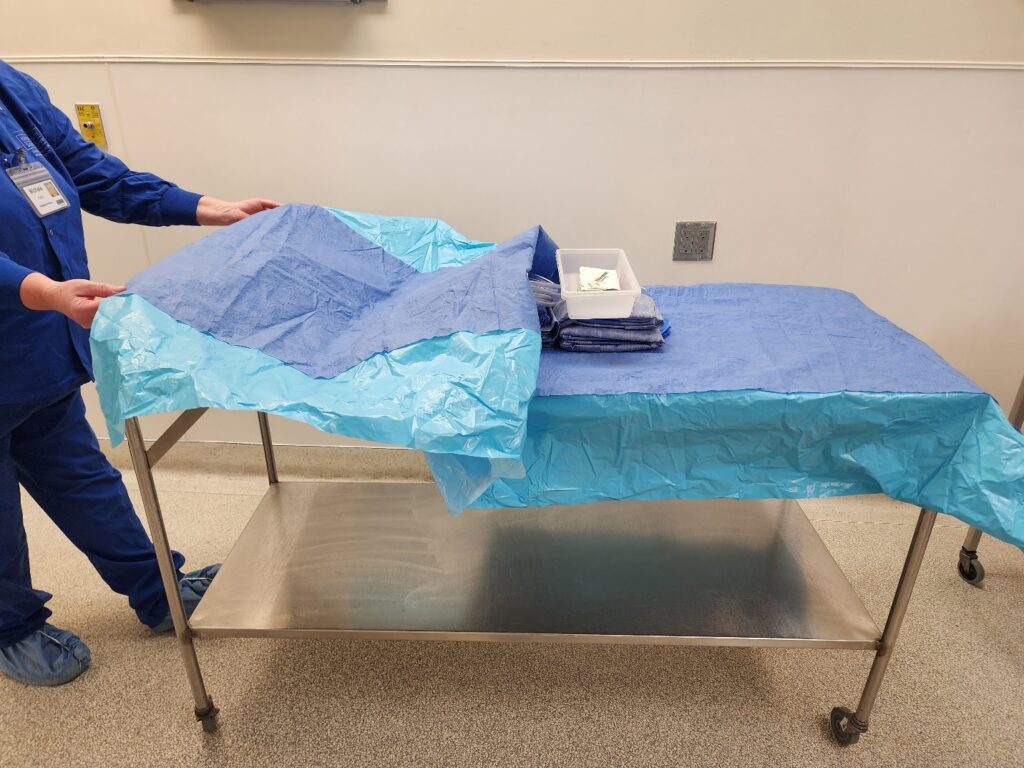
- Ensure that all flat surfaces are dry prior to placing sterile packs or drapes. This must be done as moisture can contaminate supplies.
- Set-up packs are often used to reduce the time spent and the potential for contamination when opening individual supplies.
- When set-up packs are unavailable, drapes can create a sterile field on a flat surface. These drapes must be packaged with cuffs to allow for non-scrubbed personnel to open safely.
- Non scrubbed personnel must protect the sterility of the drape by avoiding contact with sterile areas and cuffing their hand underneath the drape. The non-scrubbed person opens the drape by pulling it toward themselves. They then must walk to the other side of the sterile table to open the opposite side.
(King & Spry, 2019; ORNAC, 2021)
Sterile Drape Placement
Sterile drapes are used in the operating room to create the sterile field:
- Once placed, sterile drapes are not lifted or moved.
- When placing sterile drapes on tables or surfaces, the circulator must follow aseptic techniques to establish the sterile field.
- When placing drapes on the patient to create a sterile field, care must be taken to ensure that scrubbed personnel do not contaminate themselves. This will be discussed further in the module on prepping and draping.
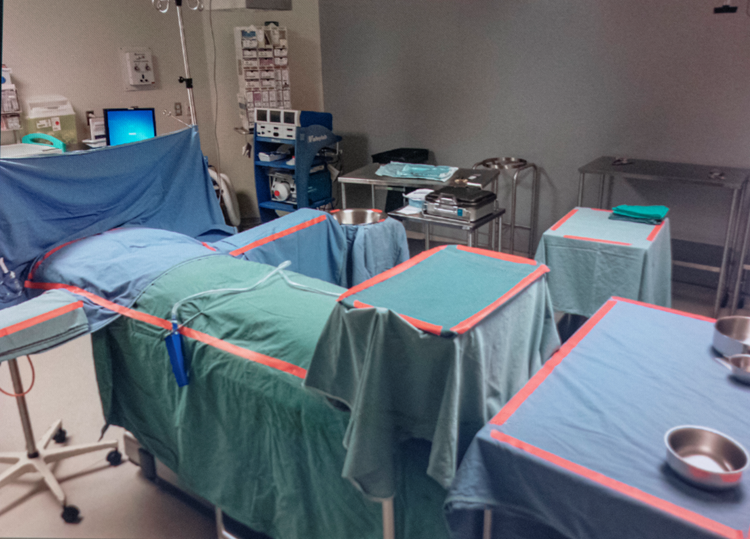
What Areas are Considered Sterile?
All personnel in the OR must understand sterile and unsterile areas.
- Sterile/scrubbed personnel should only touch sterile areas.
- Nonsterile/circulating/non-scrubbed personnel must not touch or lean over any areas considered sterile. If this happens, a breech has occurred and must be addressed immediately.
- Only the top working surface of a drape is considered sterile; i.e., the tabletop and top of the surgical drape covering a patient.
- Scrubbed personnel should not place fingers along the edge of a sterile surface to move items.
- See image below. All areas within the red tape are considered sterile. Anything below the red tape should not be touched by scrubbed personnel as it is not considered sterile
- (King & Spry, 2019; ORNAC, 2021)
Ensuring Sterility of items – Items Manufactured Offsite
Consumable items that are packaged and sterilized before arriving at an institution always have an expiry date. These expiry dates are used when the manufacturer can only guarantee sterility or product quality for a limited time. Expiry dates must be adhered to, in addition to inspecting each package for damage or potential contamination prior to opening it onto the sterile field.
Many items travelling from other facilities such as the manufacturers of disposable items, or sterilized linens, will often have a plastic covering in addition to the sterile packaging. This protective plastic covering is called a dust cover which helps protect it from contamination in transport or storage before use. Ensuring Sterility of Items – Items Packaged Within an Institution
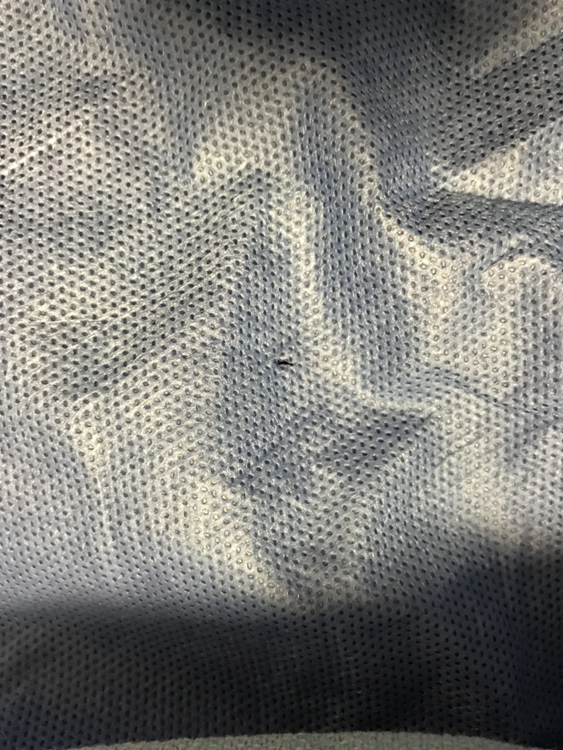
Items that are reusable and packaged onsite have a different method of ensuring sterility. Rather than an expiry date, items are considered sterile based on event-related occurrences.
Items should be considered no longer sterile/contaminated in these instances:
- The item is dropped on the floor.
- The packaging is torn or damaged. Even the smallest tear (like the one pictured here) can mean an entire set is contaminated. For this reason, all items must be inspected carefully.
- Whenever the perioperative nurse has concern about sterility.
Ensuring the Sterility of Items – Sterile Indicators
Both the circulating and scrub nurses must be able to verify the sterility of items before adding them onto the sterile field. This includes indications that items have been sterilized on the external AND internal packaging. You will learn more about the sterilization process in Course 3; however, when setting up the sterile field it is vital that the scrub and circulating nurses can identify the indicators they must observe.
Any item found not to have the appropriate indicators present (or present, but not changed according to the manufacturer’s guidelines) must be considered contaminated and cannot be used.
(ORNAC, 2021 – 2.17; 2.27)
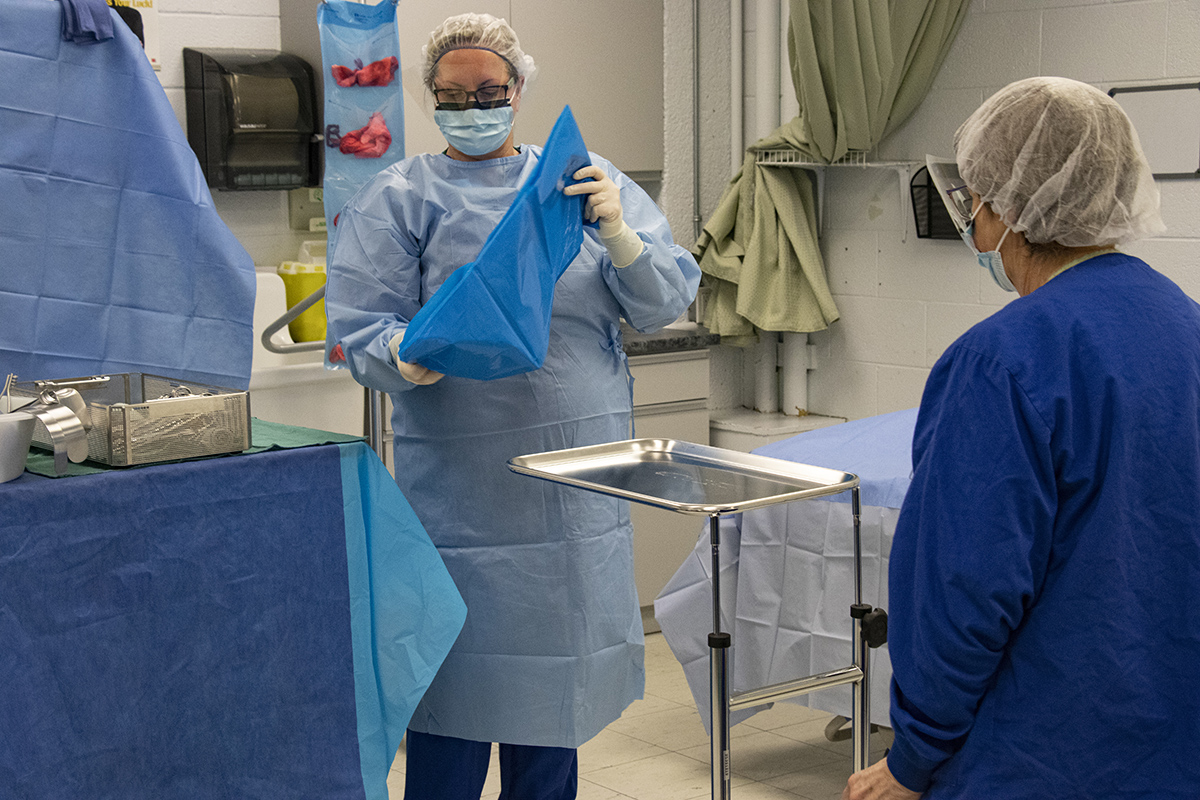
Adding Items to the Sterile Field
The sterile field should be set up and items added as close to the surgical start time as possible to reduce the risk of contamination.
Before items are added to the sterile field, the circulating and scrub nurse must assess them to ensure:
- The integrity of the wrapping, package, or container.
- That all tamper-proof devices remain in place.
- The item has not passed its expiry date.
- The presence of sterile indicators both externally and internally, including the appropriate chemical. Reaction changes to confirm sterility.
- There are no signs of moisture.
If there is ever a question about the sterility of an item, it must be considered contaminated.
(ORNAC, 2021 – 2.17)
Use the scrollbar to reveal the image sequence.
Step 1: Non-scrubbed personnel should NEVER reach over the sterile field to deliver items to scrubbed personnel.
Step 2: If an item is heavy, it should be opened on a back table/flat surface.
Step 3: Items should be presented to the scrub personnel and NEVER be flipped onto the sterile field.
Step 4: Opening the sterile wrapper
- First, open the top flap away from non-scrubbed personnel.
- Then open the side flaps.
- Finally, open the inside/proximal flap toward the non-scrubbed personnel so that they are not reaching over the item.
- The scrub nurse should check for sterile indicators and remove the item by lifting it straight up.
Step 5: Opening peel pouches
- Non-scrubbed personnel should visually check for sterile indicators.
- The pack should be peeled away from the non-scrubbed person toward the scrubbed person.
- Small, sharp, or awkward items must be obtained by the scrub nurse in a way that reduces the risk of contamination and injury. For example, surgical blades should be obtained using a hemostat or sturdy grasping forceps.
(King & Spry, 2019; ORNAC, 2021 – 2.17)
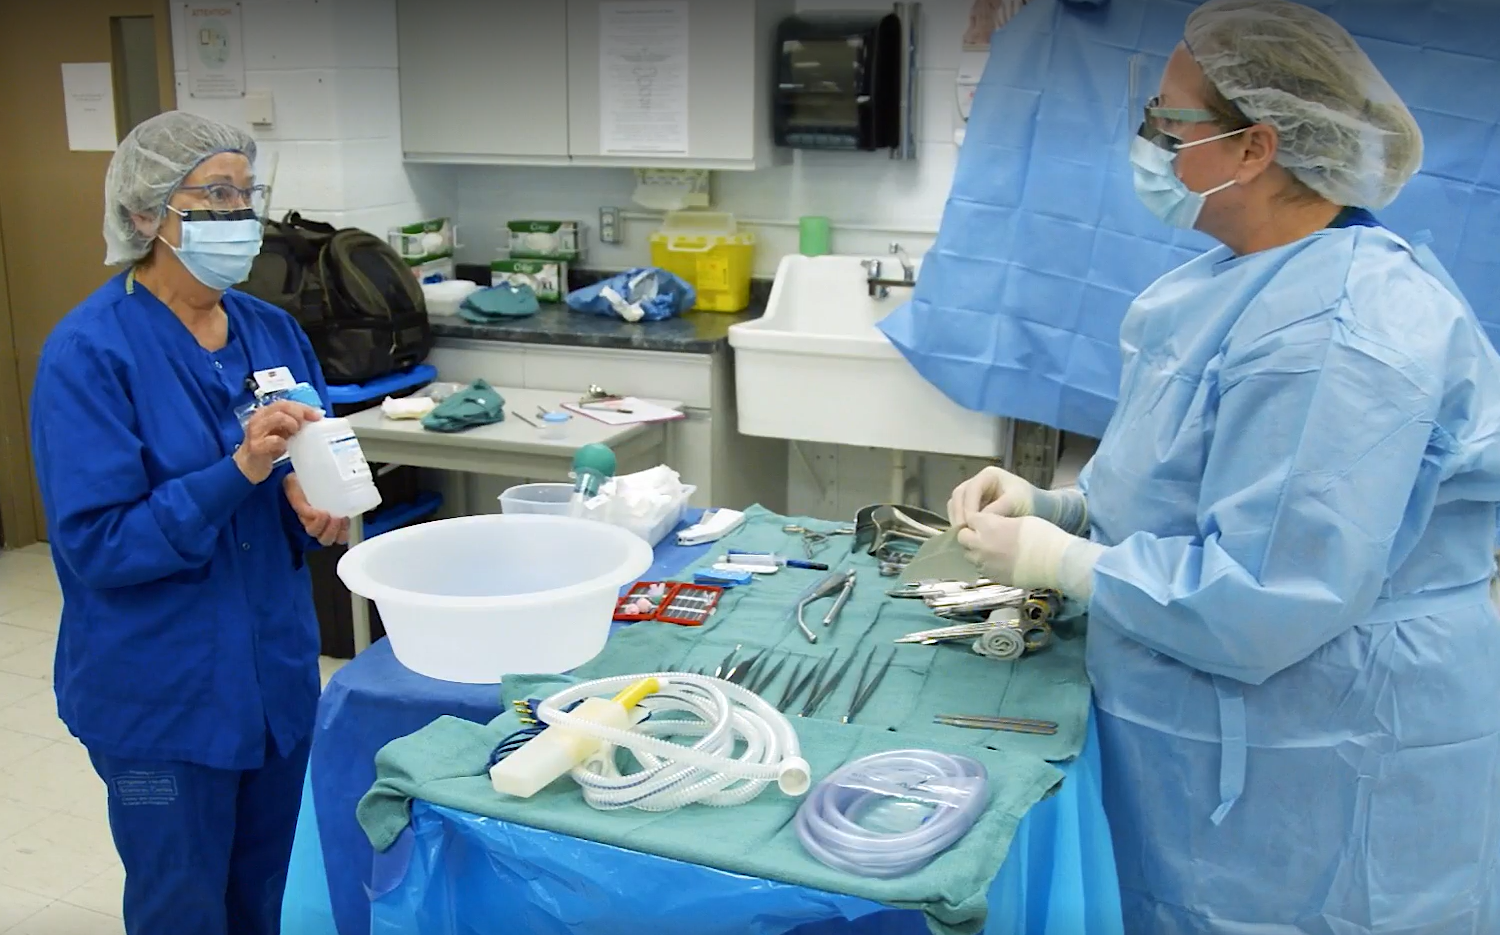
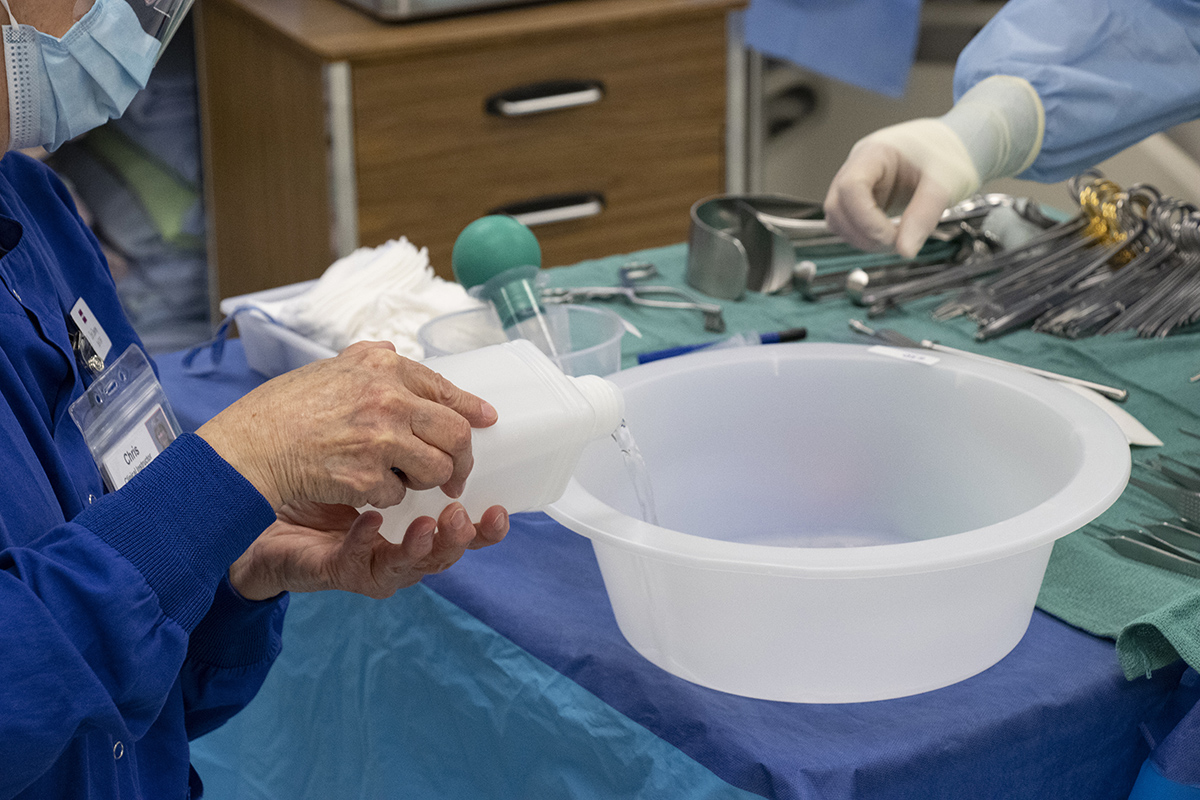
Adding Fluids onto the Sterile Field
Fluids must be added to the sterile field in a manner that protects the sterile surfaces:
- The circulator maintains a safe distance from the sterile field.
- The circulating nurse shows the bottle of solution to the scrub nurse so that they can verify the contents and expiry date.
- The scrub nurse should place the graduate or solution container close to the edge of the sterile field, so the circulator can pour without reaching over the sterile field.
- The solution should be poured slowly, in a manner that does not cause splashing onto the sterile field and ensures a steady stream.
- Once the flow of fluid pauses, the solution should not be used again onto the sterile field as drops may be on the outer lip and are not considered sterile.
(King & Spry, 2019; ORNAC, 2021).